Human in the loop
Botpress allows you to build a powerful tool for autonomous communication with your users. However, there might be use cases hard to implement as a workflow in a Botpress chatbot or sometimes a user wants something that is not yet supported by your chatbot. To offer the best user experience, it's common to set a human handoff system where a conversation between your chatbot and a user is transferred to an agent.
The Human-in-the-Loop module (aka HITL) allows you to do just that.
A new, more feature-rich version of HITL is in beta, you can try it today. See docs here
Human-in-the-Loop is currently supported on channel-web and channel-messenger.
Once you have this module installed, you will be able to:
- Pause a user's conversation with the bot
- Alert your agents that a conversation requires attention
- As an agent you will be able to continue the conversation via the admin-panel
- Resume conversation with the bot
Pausing conversation
There are several ways you can pause the conversation:
- from the HITL module, toggling the pause button

- by performing an API-request:
let base = EXTERNAL_URL + '/api/v1/bots/' + botId + '/mod/hitl
- POST {$base}/sessions/{$id}/pause
- POST {$base}/sessions/{$id}/unpause
- POST {$base}/channel/{$channel}/user/{$userId}/pause
- POST {$base}/channel/{$channel}/user/{$userId}/unpause
For example: POST http://localhost:3000/api/v1/bots/welcome-bot/mod/assets/hitl/sessions/13/pause
Alerting agents
There are a number of ways to alert your agents of a paused conversation, an email, a call to an external API or, as in the example below, via a notification in the admin-panel:
const { botId } = event
const message = user.first_name + ' wants to talk to a human'
bp.notifications.create(botId, { message, level: 'info', url: '/modules/hitl' })
The agent can then navigate to the appropriate conversation and take over the conversation from the bot.
Resuming conversation
Once the agent is done communicating with the user, they can unpause the conversation.
It is also possible for the user to unpause the conversation by calling the API endpoint.
HITL-next (beta)
This revamped HITL works on all existing and future channels. It supports all features of its predecessor and a few more :
- Multi-agents ( enterprise edition only )
- Human handoff from any workflow
- Realtime agent interface
- Agent notes
- End user profile
- Configurable transfer and assignment messages
- Message templates
- Basic queuing and assignent system
- Basic labeling
- Documented HTTP API (coming soon)
- Webhook integration (coming soon)
Requirements
This module uses the channel-web to display conversations, so make sure it's enabled. Moreover, a multi-agent setup needs an enterprise license.
Setup
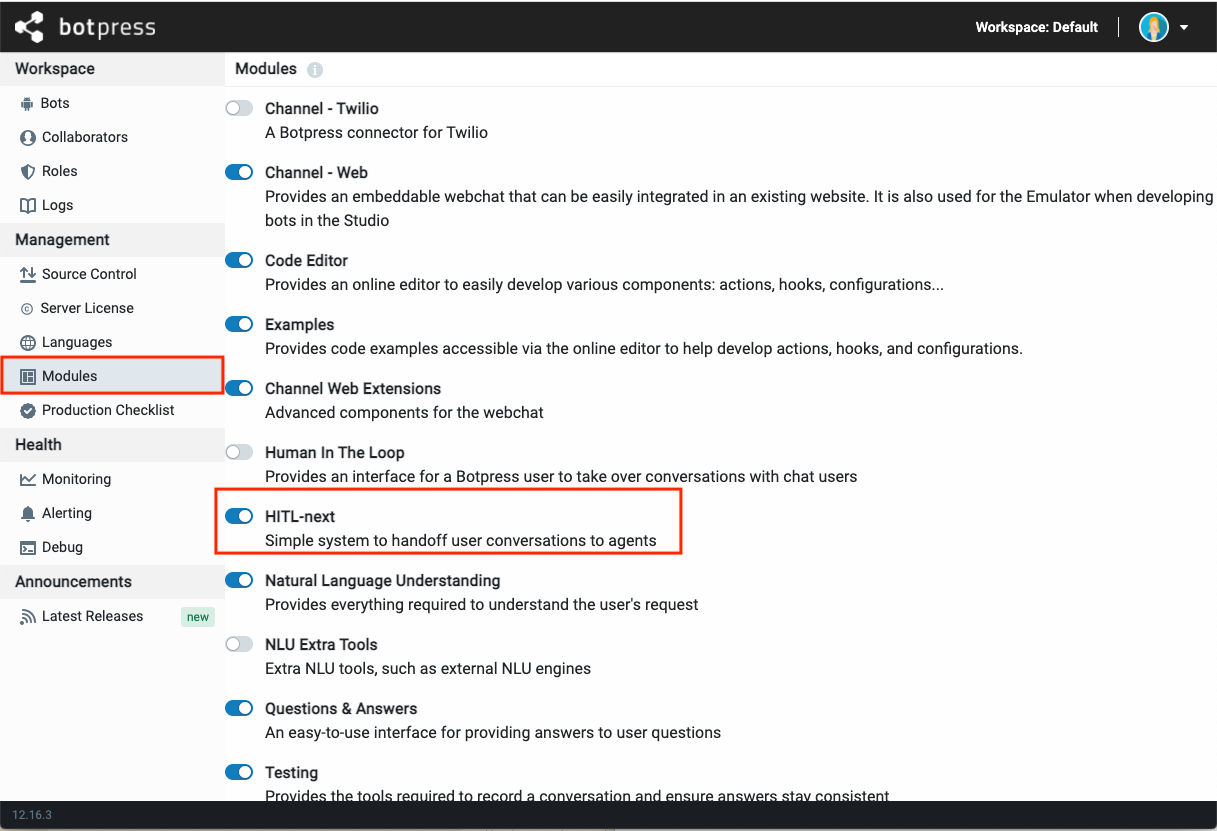
Simply turn on HITL-next on the module management page of your Botpress admin.
You can also enable the module directly in your botpress.config.json file as shown here
Agent Interface
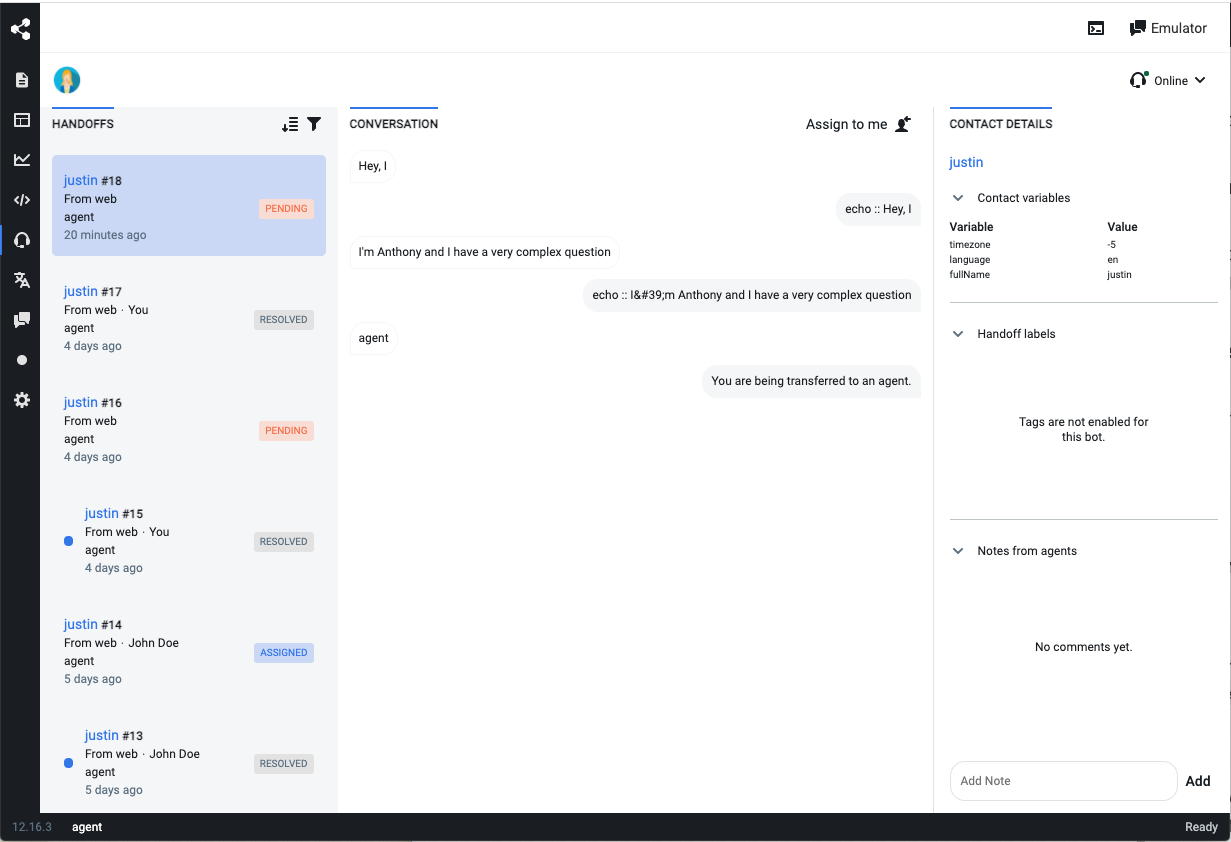
Agent interface has 3 main sections:
- Handoffs : List of all conversation handoffs created by users
- Conversation: This is where you see conversation messages and where an agent can chat with a user once the conversation has been assigned.
- Details: Where an agent sees user profile, agent notes and tags.
Adding agents
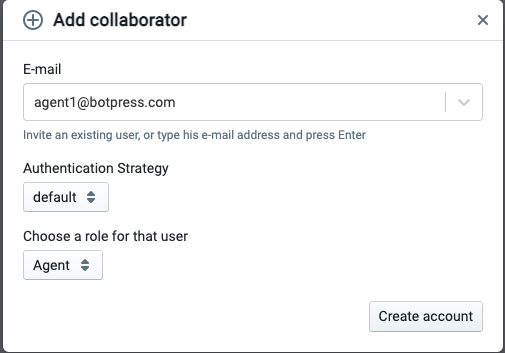
Revamped HITL allows multiple agents to collaborate on the platform. As a Botpress workspace administrator, you can invite agents, the same way you would invite other administrator or developers to your workspace. To do so, head to the Collaborators tab in your Botpress administration console, click add collaborator.

A dialog window will show up, fill in your agent email and select Agent as role. Follow the instructions and send your agents the authentication information.
Agent profile
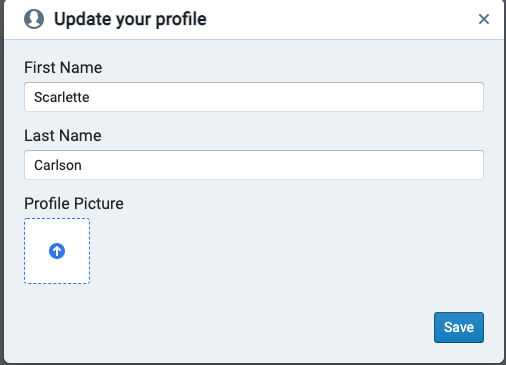
In order for agents to have their name and a proper avatar to display to users, they can configure their profile by clicking the avatar icon on the top right corner of the administration interface and then selecting the update profile option. The following form dialog will show up.
Handover a conversation to agent
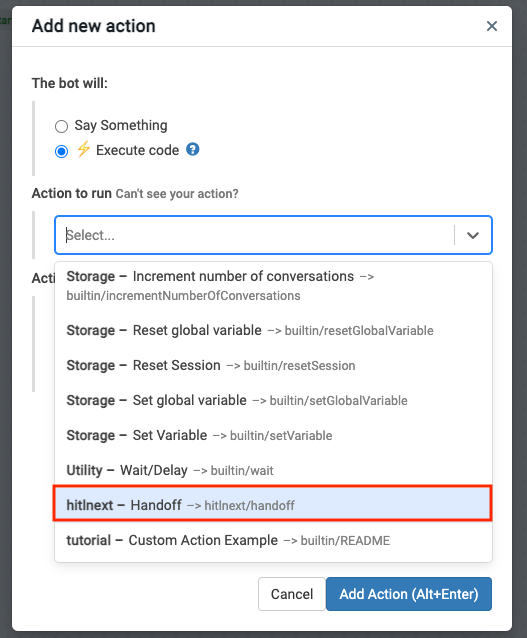
The module ships with a Handoff action that you can use wherever you want in your workflows. To add such an action, select a node in a workflow, and hit the + below on enter , then choose the handoff action.
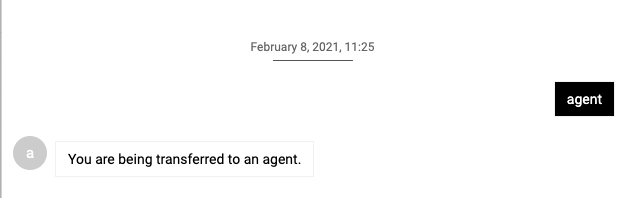
Now, ever time a user conversation goes on that node. Agents on the interface will see a new pending handoff appear in the list and will be be able to see a preview of the conversation. On the user side, your chatbots automatically send a transfer message. This message is customizable, see configuration section.
Handoff assignation and resolution
To pick a handoff and start conversing with the end user, an agent first needs to set himself/herself online in the top right corner of the Agent Interface. This simple feature allows agents or coordinators to oversee conversations while being offline. It also becomes quite handy when your team implements any kind of auto-assignation rule.
Once online, an agent can simply click on any handoff item and click on assign to me button top right corner of the conversation section. When a conversation is transferred to an agent, your chatbot will automatically send an assignation message to the user. This message is customizable, see configuration section.

There is no limit on how many handoffs an agent can handle at once, a good practice would be to limit to 3.
Once the discussion with the user is over, an agent can hand back the control to the Chatbot by simply clicking the resolve button.
User profile
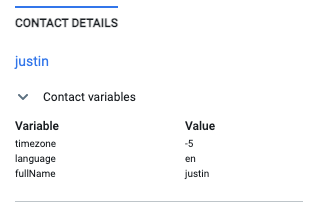
When a handoff item is selected, user variables are displayed in the user profile section. User variables can be set in any workflow using the builtin SetVariable action with the user scope. For more details, head to the variables docs.
Displayed user name is a normal user variable, simply set fullName user variable in order for it to show up in user profile.
Agent notes
Simple but powerful tool for collaboration over time, notes are associated with underlying conversations and not with the handoff item itself making them persist from one handoff to another. In other words, over the course of time, a user can have different handoff sessions with different agents and agents can leave notes so futures agents can see additional context.

Advanced features and customization
Here are the most commonly used module configurations. Some more are available, please refer to the module configuration file for more options.
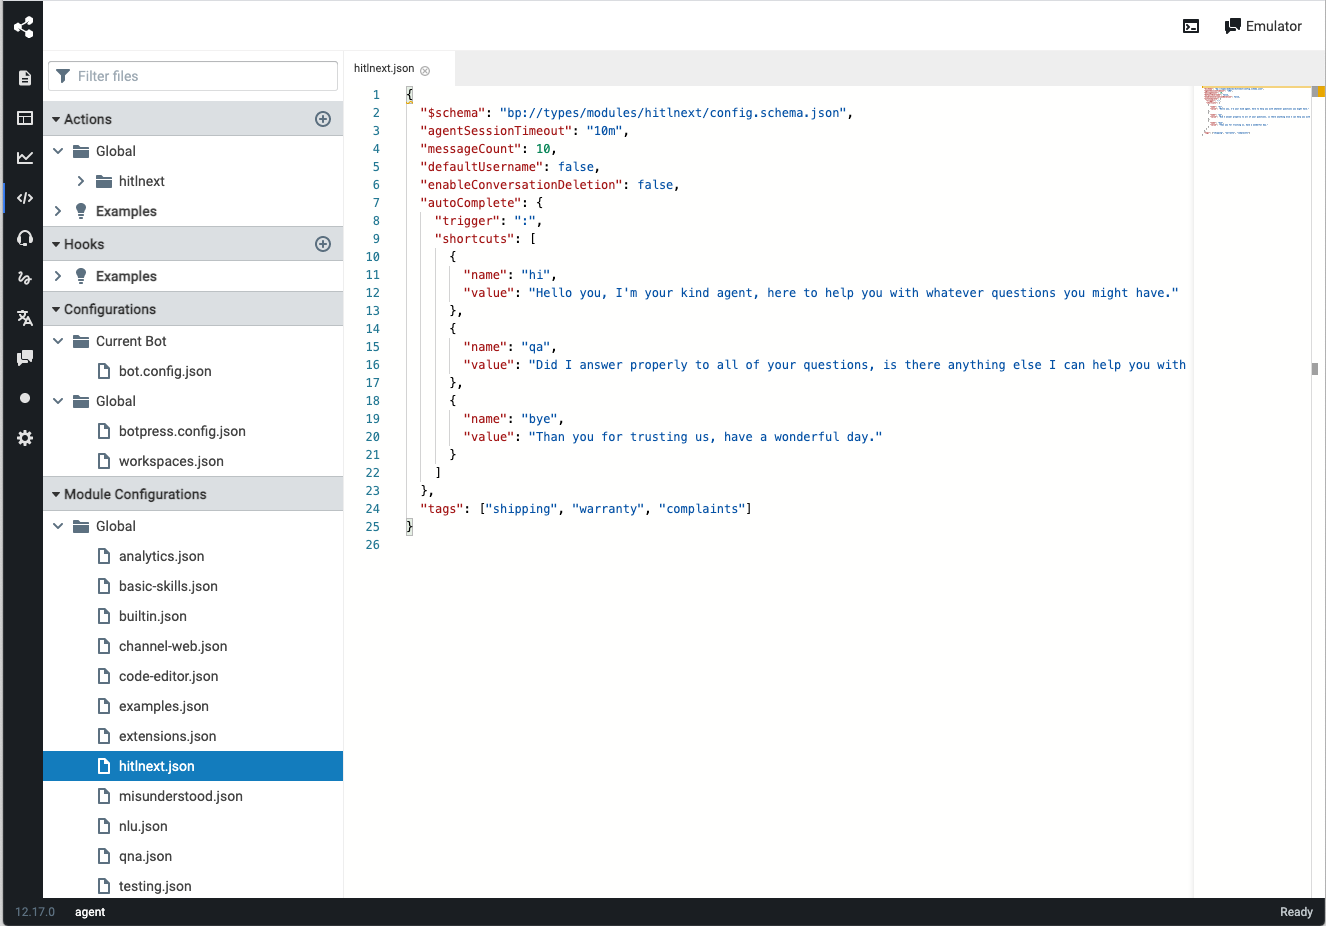
To set any of those configurations, you'll first need to open up the hitlnext.json in the code editor section of your Botpress Studio.
Transfer and assignation messages
Say we want to change Transfer message (default being You are being transferred to an agent) and want to add a German translation for your German speaking users. Simply change the transferMessage json object to the desired translations.
"transferMessage": {
  "en": "I'm tranfering you to our support team",
  "de": "Ich schicke dich zur Unterstützung"
}
To see these changes, you'll need to either disable your chatbot and re-enable it or to restart your Botpress server.
Same technique applies to Assignation Message, the only difference is that you have access to the agentName variable which corresponds to the agent full name. Using this variable is optional, refer to the default assignMessage configuration for an example usage.
Message templates
If your team of agents often use the same set of answers, you can use the autoComplete configuration to set pre-written messages so they don't have to go and type them over and over again. You can view them as shortcut for agents, none are defined by default and you can add as many as you want. Here is how they show up in the Agent Interface :
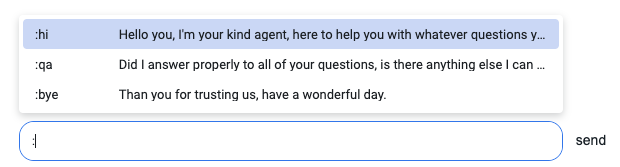
Before adding any message template, you need to choose a trigger character that will open up the templates list, ":" in this example. Then, for each of you messages you need to add a name (what you see on the left of each template and can be used to filter down the list as the agent types) and a value (the actual message that is going to be pasted in the composer). To summarize, configuration for the example above would look like the following:
"autoComplete": {
  "trigger": ":",
  "shortcuts": [
    {
      "name": "hi",
      "value": "Hello you, I'm your kind agent, here to help you with whatever questions you might have."
    },
    {
      "name": "qa",
      "value": "Did I answer properly to all of your questions, is there anything else I can help you with today?"
    },
    {
      "name": "bye",
      "value": "Than you for trusting us, have a wonderful day."
    }
  ]
}
Handoff Labels
Handoff labels are useful for your agents to categorize handoffs prior resolution so future agents can quickly know what a conversation is about. Labels also come in handy when doing an overview of resolved handoffs either for quality assurance or for reporting. You can add as many as you want but a good practice is to start with a small number of labels and adding new when necessary. Here is how they show up in the agent interface:
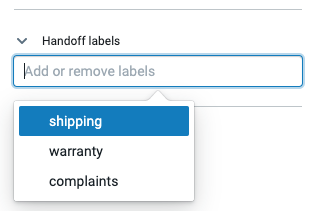
The 3 labels here are set in a simply json array as follows:
"tags": ["shipping", "warranty","complaints"]