Quick Start
Admin
The admin dashboard is the place where you'll be able to manage and configure everything related to your Botpress Server installation, including:
- Create new bots
- Manage your Botpress Pro license and sync with version control
- Update your profile and your Botpress Account
- Create new users and assign roles to them
To open the Admin Dashboard, visit http://localhost:3000 in your favorite web browser. When you open the portal for the first time, you will be asked to register the main admin account
Creating a new bot
In Botpress, bots are assigned to a workspace. When you start Botpress for the first time, you'll have a default workspace created automatically for you.
Let's create a new bot by first navigating to your workspace, then click the "Create Bot" button.
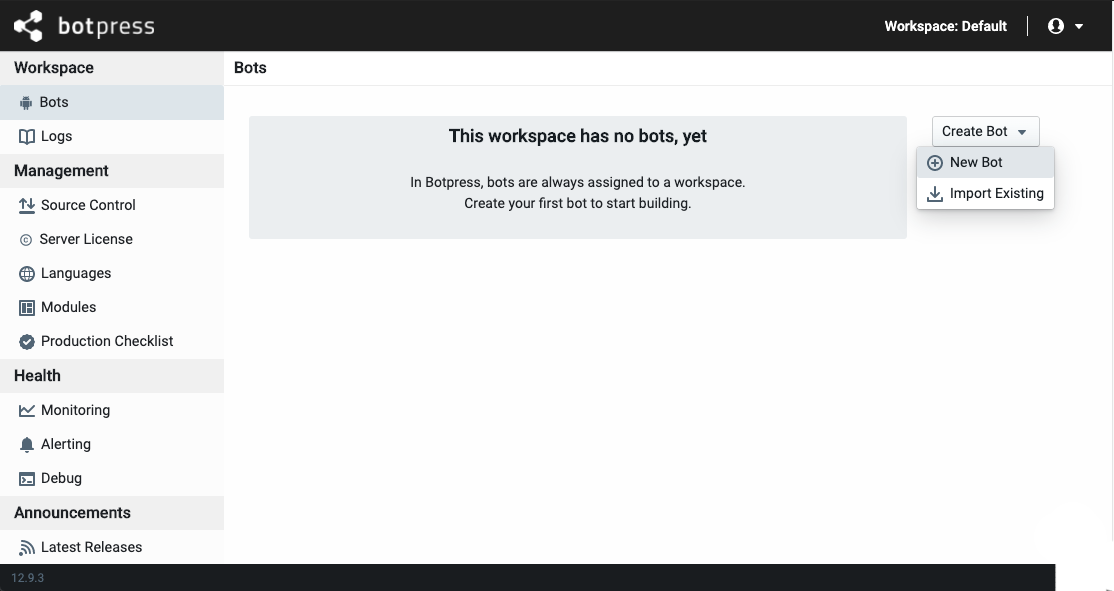
All you have to do is pick a name for your bot and a unique Bot ID will be generated for you.
The Bot ID can't be changed in the future so it's important to pick a meaningful name. Also, bear in mind that this ID will be visible to the users of your bots.
Once created, click on the bot to open the Studio interface and edit your bot.
Studio
The Studio is the main interface you'll use to build and edit your bot. From here, you can:
- Train an NLU model
- Create dialog flows
- Test and debug your bot
You will notice on the left there are a couple of sections available. Some of these are built inside Botpress (like Content and Flows), where some are there because of modules installed. Indeed, Botpress is a highly modular platform and the majority of the features you will use are provided by the modules themselves.
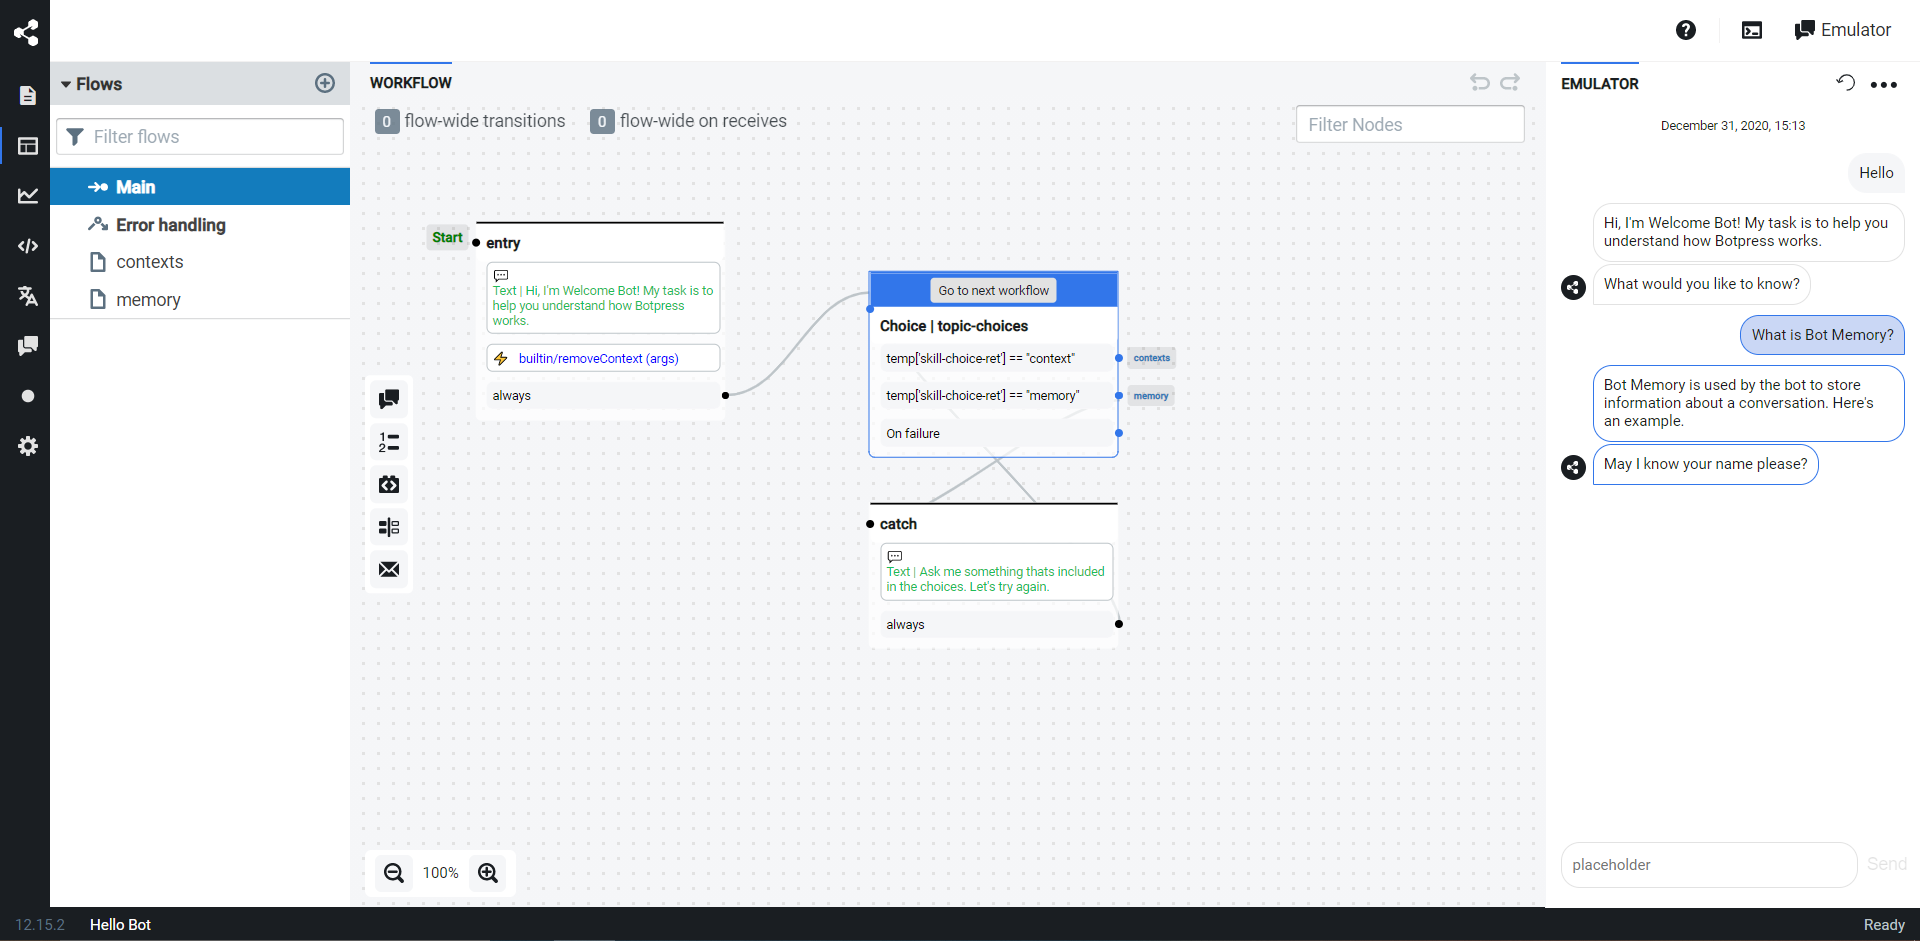
Test your bot
To test your bot, there are two different kinds of emulators. You can use the built-in chat emulator located in the bottom right corner, which is exactly what your visitors will face when they speak with your bot. You can also start a new conversation with your bot by clicking the reset button.

Open the chat window and say "Hello". The bot should greet you with something like "May I know your name?".
There is another emulator, which is specifically designed for you (the bot owner) to understand quickly why the bot gives you a specific answer. That emulator is only available for authenticated users. It includes all sorts of useful information: a list of suggested answers by module, nlu intents, and the elected suggestion.

Question and Answer
One of the modules shipped by default with Botpress is the QnA (Question and Answer) module. This module allows you to easily and quickly add knowledge to your bot without having to create a flow or code anything. QnA uses the NLU Engine behind the scene to detect the questions and automatically answer them.
Adding a QnA
- Click the QnA panel on the left
- Click the "Add New" button
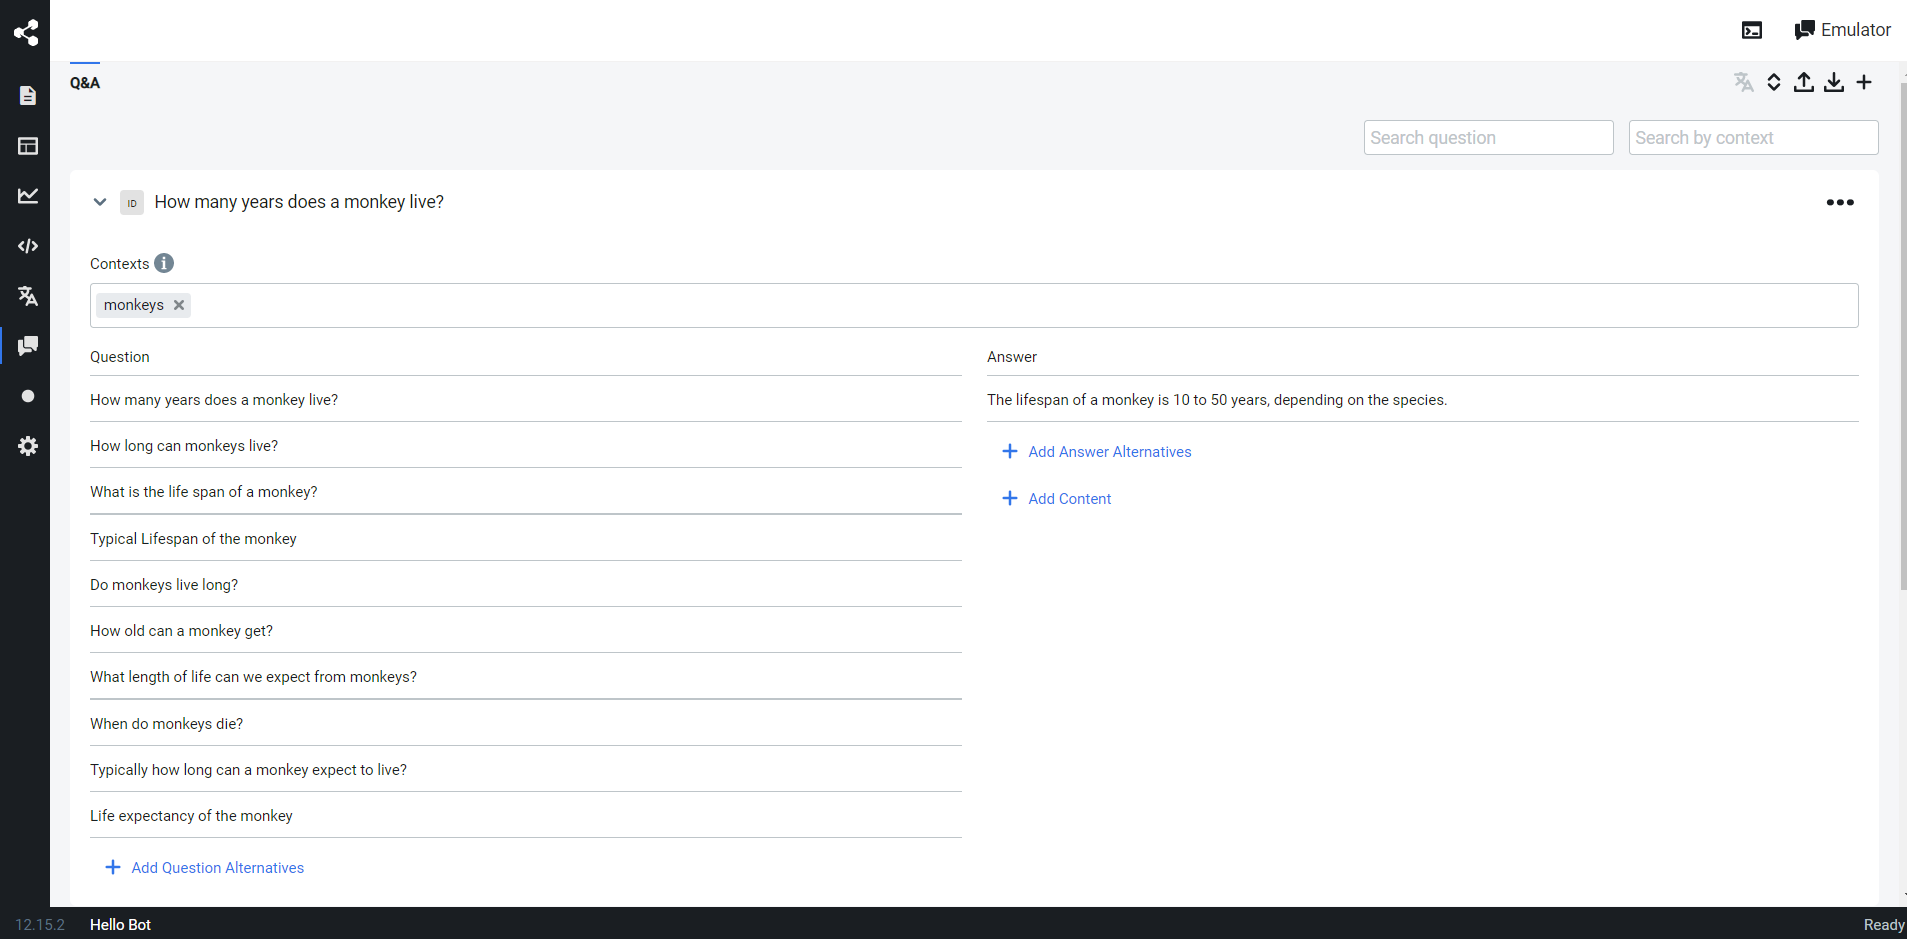
- Type in the "Questions" textbox a question, for example, "How old are you?". Then add as many different ways of asking the same question as you want.
- In the "Reply With", type the answer you want your bot to provide
- Click "Save"
The QnA module will automatically retrain the NLU model in the background and tell you when it's completed. You can speak again with your bot and it should respond to your question correctly, even if you make some typos!
QnA Example
Share your bot
Standalone chat
Congratulations on building your first bot! You can share this bot with your friends, it is available at http://localhost:3000/s/<<Bot ID>>.
Embed on a website
You can also embed this bot on a website, there's an example provided in assets/modules/channel-web/examples/embedded-webchat.html, which you can see by browsing here.