Configuration
Most of the configuration is done using JSON files. Configuration can also be set by using environment variables.
On this page, you will learn about Botpress global configuration, individual bot configuration, module configuration, and environment variables.
Botpress Global Config
This is the main file used to configure the Botpress server. It will be created automatically when it is missing. Default values should be good when discovering Botpress, but in this page you will learn about the most common configuration you may need to change.
To get more information about each individual options, check out the comments on the configuration schema
HTTP Server Configuration
By default, Botpress will start an HTTP server on localhost, listening to port 3000. If the configured port is already in use, it will pick the next available one. You can change these by editing httpServer.host and httpServer.port.
Exposing your bot on the internet
When you are ready to expose your bot externally, you will need to change some of the server settings. The server doesn't support HTTPS connections, so you will need to set up a reverse proxy in front of it (for example: NGINX).
This means that your server will still listen for connections on port 3000, but your reverse proxy will answer for queries on port 80. It's also the reverse proxy that will handle secure connections if you want to access your bot using https
At this point, Botpress doesn't know how to access the bot from the web. You will need to edit the configuration of httpServer.externalUrl. Set the configuration variable to the complete host name, for example https://bot.botpress.com
Changing the base URL of your bot
By default, Botpress is accessible at the root of your domain (ex: https://bot.botpress.com/). It is possible to change that so you can serve it from a different URL, for example https://bot.botpress.com/botpress/somepath/. All you need to do is set the External URL, either in environment variable (EXTERNAL_URL), or via the botpress.config.json file.
The path will be automatically extracted from that URL, and will be used as the root path.
Logs Configuration
Logs are very useful to debug and understand what happens when the bot doesn't behave as expected.
When you start Botpress from the binary (or using the Docker image), the bot is in debug mode. This means that a lot of information will be displayed in the console to understand what happens.
There are 5 different levels of logs:
- Debug: display very detailed information about the bot operations
- Info: gives general information or "good to know" stuff
- Warn: means that something didn't go as expected, but the bot was able to recover
- Error: there was an error that should be addressed
- Critical: something prevents the bot or the server from behaving correctly (may not work at all)
Change Log Verbosity
There are three different configuration of verbosity for the logger:
- Production (verbosity: 0)
- Developer (verbosity: 1)
- Debug (verbosity: 2)
By default, Botpress uses the Debug configuration.
When you run Botpress in production BP_PRODUCTION=true or with cluster mode CLUSTER_ENABLED=true, logs will be configured as Production
You can configure the level of verbosity using an environment variable (VERBOSITY_LEVEL=0 for production) or using command line (ex: -vv for Debug)
Production
- The console will display
info,warn,errorandcriticallogs - In the studio's log console, bot developers will see
debuglogs for their bot - No stack traces* will be displayed in the console
Developer
- Same thing as
Production, but the console will also include stack traces*
Debug
- Includes everything from
ProductionandDeveloper - Debug logs will be displayed in the main console
* Stack traces are additional information used by developers to identify the source of an error. They are useful when developing, but in production they can hide important log messages.
How to save logs on the file system
It is also possible to send log output to a file in a specific folder. Check below for the required configuration
Edit your botpress.config.json file and change your file to match the following:
{
  ...
  "logs": {
    ...
    "fileOutput": {
      "enabled": true,
      "folder": "./", // Change this to any folder, by default it will be in the same folder as the executable
      "maxFileSize": 10000 // By default, the maximum file size will be kept under 10mb
    }
  },
}
Advanced Logging
In a production environment, you may want to persist additional logs such as full audit trail. You can enable more granular logs by using the DEBUG environment variable and saving those extra logs to a separate file:
# Linux & OSX
# Append audit trail to log file
DEBUG=bp:audit:* ./bp -p 2>> ./botpress.log
Tip: You can combine this with a log rotation tool such as newsyslog or logrotate.
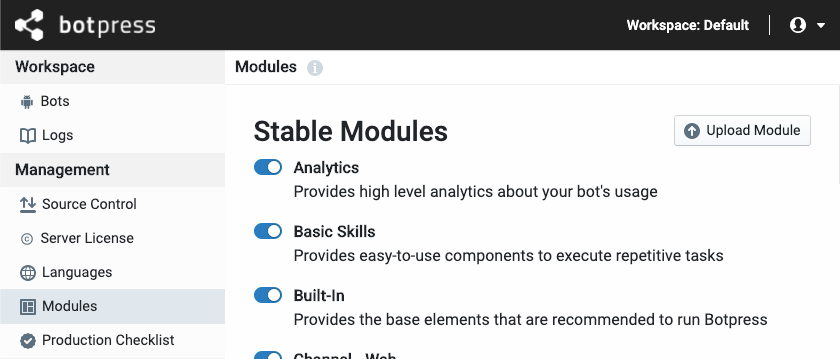
Enable or disable modules
When you start Botpress for the first time, the most popular modules included with the binary will be added to your botpress.config.json file. If you want to disable or enable modules, you may either do so in the admin page, or edit the modules property in botpress.config.json.
Should you choose the latter, note that the string MODULE_ROOT is a special one that is replaced when your configuration file is read. It represents the location of the modules folder on your hard drive; you shouldn't have to change it.
{
  ..."modules": [
    {// When you add new modules, you need to set their location, and if they are enabled or not.
      "location": "MODULES_ROOT/analytics",
      "enabled": true // You can change this to false to disable the module.
    },
    {
      "location": "MODULES_ROOT/basic-skills",
      "enabled": true
    }
}
Individual Bot Configuration
Every bot that you create will have its own configuration file. It is located at data/bots/BOT_ID/bot.config.json. Most of the available options can be edited by clicking on the Config link next to the bot name on the administration panel, or accessing the configuration panel from the bot studio.
Module Configuration
When you enable a module on Botpress, it is available globally, which means that you can't disable or enable them for specific bots. However, you can configure every bot differently.
Each module has a different configuration, so we won't go through that here. What you need to know is that when you run a module for the first time, the default configuration will be created in data/global/config/MODULE_NAME.json. If you need a special configuration for your bot, from the Code Editor you can right click any global configuration, then Duplicate to current bot.
Alternatively, you can manually create a config folder in the bot folder, copy the configuration file in it: data/bots/BOT_ID/config/MODULE_NAME.json.
Environment Variables
Most of these variables can be set in the configuration file data/global/botpress.config.json. Infrastructure configuration (like the database, cluster mode, etc) isn't available in the configuration file, since it is required before the config is loaded.
Botpress supports .env files, so you don't have to set them every time you start the app. Save the file in the same folder as the executable.
Common
| Environment Variable | Description | Default |
|---|---|---|
| PORT | Sets the port that Botpress will listen to | 3000 |
| BP_HOST | The host to check for incoming connections | localhost |
| EXTERNAL_URL | This is the external URL that users type in the address bar to talk with the bot. | http://HOST:PORT |
| DATABASE_URL | Full connection string to connect to the DB. For postgres, start with postgres:// | - |
| BP_PRODUCTION | Sets Botpress in production mode. This has the same effect as starting it with -p | false |
| BPFS_STORAGE | Storage destination used by BPFS to read and write files (global and bots) | disk |
| PRO_ENABLED | Enables the pro version of Botpress, the license key will be required | false |
| BP_LICENSE_KEY | Your license key (can also be specified in botpress.config.json) | - |
| CLUSTER_ENABLED | Enables multi-node support using Redis | false |
| REDIS_URL | The connection string to connect to your Redis instance | - |
| AUTO_MIGRATE | Automatically migrates bots up to the running Botpress version | - |
| DEBUG | Namespaces to debug | - |
Runtime and Modules
| Environment Variable | Description | Default |
|---|---|---|
| VERBOSITY_LEVEL | Botpress will be more chatty when processing requests. This has the same effects as -v | |
| BP_DECISION_MIN_CONFIENCE | Sets the minimum threshold required for the Decision Engine to elect a suggestion | 0.3 |
| FAST_TEXT_VERBOSITY | Define the level of verbosity that FastText will use when training models | 0 |
| FAST_TEXT_CLEANUP_MS | The model will be kept in memory until it receives no messages to process for that duration | 60000 |
| REVERSE_PROXY | When enabled, it uses "x-forwarded-for" to fetch the user IP instead of remoteAddress | false |
It is also possible to use environment variables to override module configuration. The pattern is BP_MODULE_%MODULE_NAME%_%OPTION_PATH%, all in upper case. For example, to define the languageSources option of the module nlu, you would use BP_MODULE_NLU_LANGUAGESOURCES.
Tip: You can list the available environment variables for each module by enabling the
DEBUG=bp:configuration:modules:*flag.
Security
These variables can be used to disable some sensitive features destined to Super Admins.
| Environment Variable | Description | Default |
|---|---|---|
| BP_CODE_EDITOR_DISABLE_ADVANCED | The advanced editor lacks some safeguard and is only intended for experienced users. It can be disabled completely using this environment variable | false |
| BP_CODE_EDITOR_DISABLE_UPLOAD | Prevent users from uploading files when using the advanced editor | false |
| BP_DISABLE_SERVER_CONFIG | Prevent Super Admins from accessing the "Production Checklist" page on the Admin panel, since it may contain sensitive information | false |